
"2024 Approved Unlocking the Full Potential of Mac Audio with Audacity's Features"
Unlocking the Full Potential of Mac Audio with Audacity’s Features
Meta: Looking for a free software to record and edit audio on Mac? Audacity is a great choice. Learn how to record audio with Audacity on Mac.
Are you looking for a free application for your Mac where you can record your audio and edit it as per requirements? Audacity is a popular choice among Mac users, especially among musicians who work with multi-track audio. In fact, even podcasters with limited budget prefer Audacity Mac for its advanced editing options.
Audacity is a free and open-source application. It is quite advanced in its features even though it is completely free to download and use. That is why not just beginners but professionals prefer it over other premium audio recorders and editors. However, Audacity is slightly complicated to operate. In this article, we will illustrate how to use Audacity on Mac and recommend a better alternative.
1. How to download and install Audacity on Mac?
Downloading and installing Audacity macOS is not as simple as any other application. You can blame Audacity Developers for making it complicated for Mac users. You can either download the application from the official website or from their download partner – FossHub. Here are the steps to download and install Audacity Macbook and iMac.
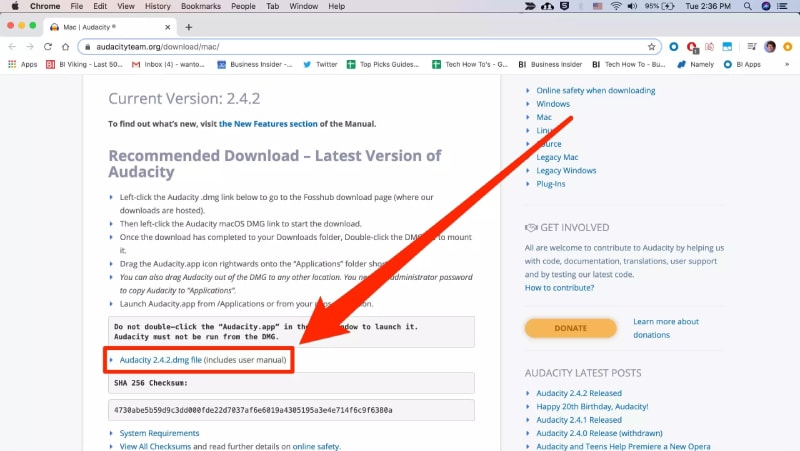
Step 1: Visit Audacity Download page.
Step 2: It should download Audacity DMG file automatically. However, if it does not, click on “Audacity (version) dmg file” on the Download website.
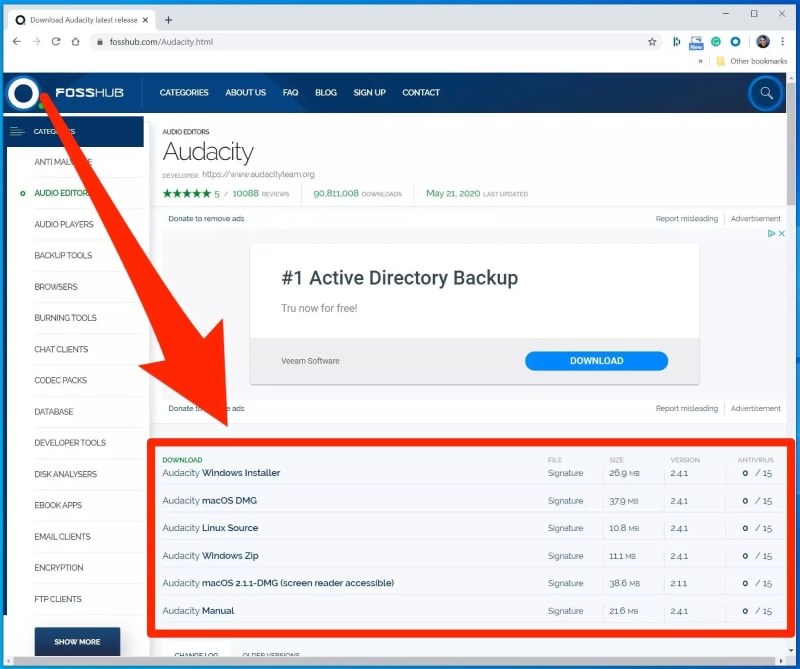
Alternatively, you can go to FossHub and search for Audacity and download the latest Audacity macOS DMG file.
Step 3: Once the downloading of the file is complete, double-click on the downloaded “Audacity macOS DMG” file to start installing the file. You can also find the file under Downloads from Finder.
Step 4: Follow the on-screen instructions to complete the installation process.
Step 5: Go to Applications and launch Audacity. In case it does not open from Applications, you can go to the location where Audacity is installed and open directly from there.
2. How to record audio with Audacity on Mac?
We have already stated that operating Audacity on Mac is slightly complicated. Audacity is designed to record audio from external sources through microphone. Here are the steps on how to use Audacity on Mac to record audio with a microphone.
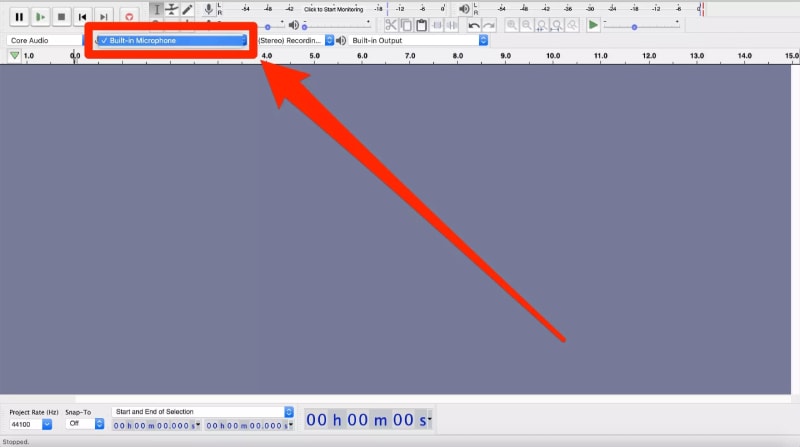
Step 1: Launch Audacity and go to Recording Device tab.
Step 2: Click on the second option and you will see all the recording devices connected to your Mac. Select the microphone whose audio you want to record. If you do not see your microphone, make sure it is properly connected.
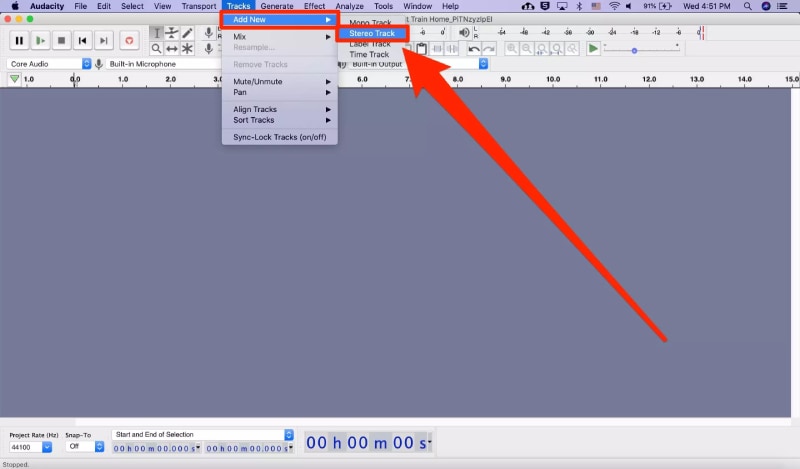
Step 3: Go to Tracks menu option and go to Add New. Here, you have to select either Stereo Track or Mono Track as per your requirement.
Step 4: Now, you are ready to start recording your audio through microphone using Audacity. Click on Record button at the top bar. The recording will start immediately and you will see audiograph of your audio which shows that your voice is getting recorded.
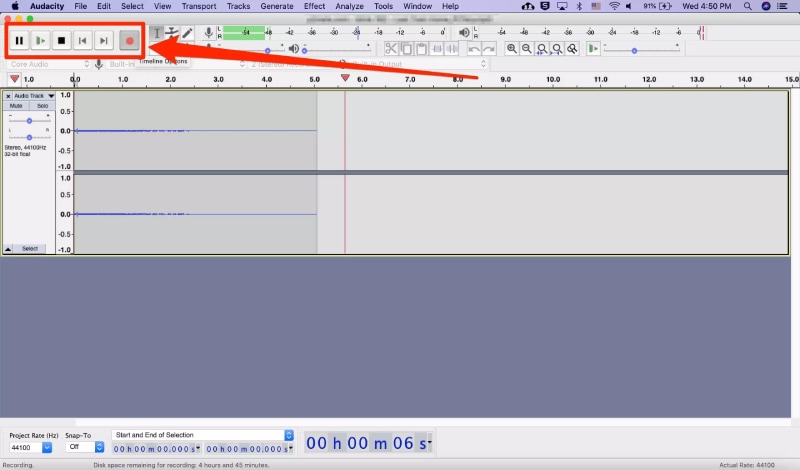
Step 5: When you are done, click on Stop button at the top bar.
3. Alternative way to record sound on Mac
There are several issues with Audacity Mac version. Audacity record computer audio Mac without microphone is quite complicated. Besides, Audacity Mac Catalina is not supported. The user interface is overwhelming for beginners which is why many users look for a better alternative. We recommend Wondershare Filmora to record sound on Mac.
Filmora is a professional audio and video recording software and it has an inbuilt editor to edit out recorded audio and video instantly. The user interface is very intuitive and relatively easy to use in comparison to Audacity. Here are the features of Filmora that you should know before you purchase the software for Mac.
For Win 7 or later (64-bit)
For macOS 10.12 or later
- Record only external microphone audio.
- Record only computer audio even when mic is plugged in.
- Record both computer and mic audio simultaneously.
- Record screen and webcam video along with audio.
- Edit audio recording such as trim out unnecessary parts.
- Add audio effects and external audio files.
- Export the recorded audio and video files in different file formats.
Here are the steps on how to record any audio with video using Filmora.
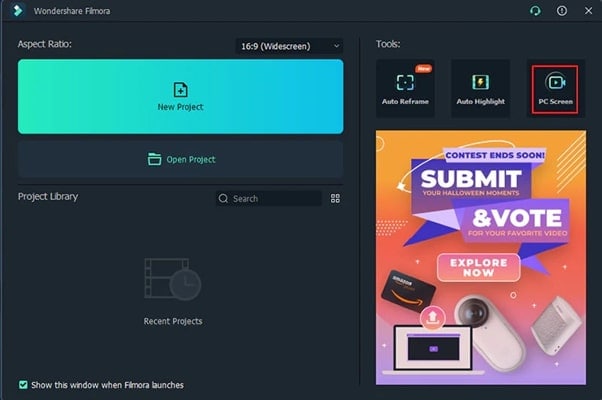
Step 1: Download and install Wondershare Filmora. Launch the application and select PC Screen option.
Step 2: From Recording window, set the video recording screen size as per your requirement.
Step 3: Make sure the system audio is turned on and correctly selected beside the recording screen size. If you want to record microphone sound as well, turn it on and select it correctly.
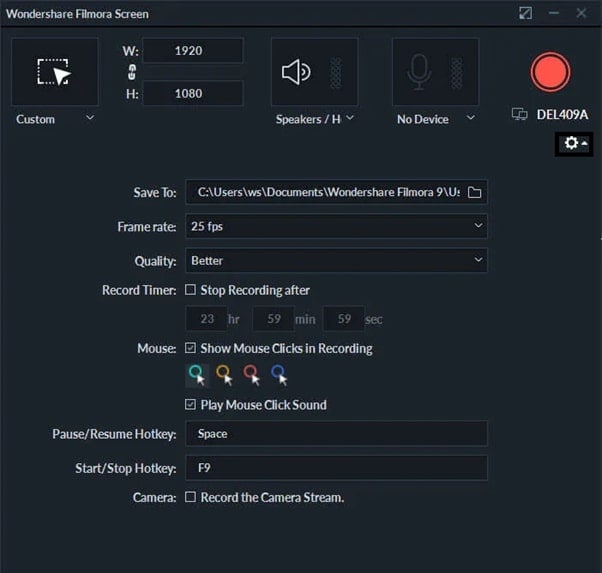
Step 4: Click on Record button to start recording. You will get a buffer time to get your screen ready.
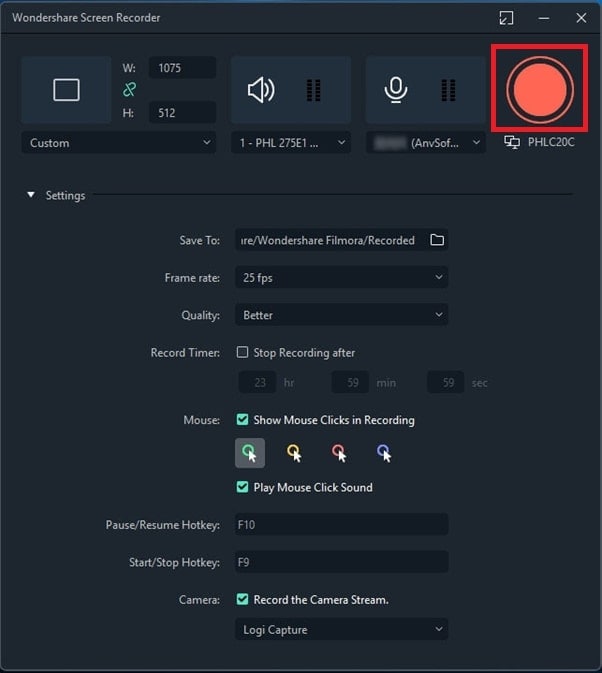
Step 5: Click on Stop button or use F9 key again to stop recording. You can edit and export the recorded audio with video to save on your computer.
Conclusion
If you are looking for a free audio recorder on Mac, Audacity fits in perfectly. However, there are several drawbacks of Audacity Mac and its operation is not as easy as any other audio recorder. That is why we recommend Wondershare Filmora as an alternative to Audacity Mac as it takes care of all the issues on Audacity and offers better features and functionalities.
For macOS 10.12 or later
- Record only external microphone audio.
- Record only computer audio even when mic is plugged in.
- Record both computer and mic audio simultaneously.
- Record screen and webcam video along with audio.
- Edit audio recording such as trim out unnecessary parts.
- Add audio effects and external audio files.
- Export the recorded audio and video files in different file formats.
Here are the steps on how to record any audio with video using Filmora.
Step 1: Download and install Wondershare Filmora. Launch the application and select PC Screen option.
Step 2: From Recording window, set the video recording screen size as per your requirement.
Step 3: Make sure the system audio is turned on and correctly selected beside the recording screen size. If you want to record microphone sound as well, turn it on and select it correctly.
Step 4: Click on Record button to start recording. You will get a buffer time to get your screen ready.
Step 5: Click on Stop button or use F9 key again to stop recording. You can edit and export the recorded audio with video to save on your computer.
Conclusion
If you are looking for a free audio recorder on Mac, Audacity fits in perfectly. However, there are several drawbacks of Audacity Mac and its operation is not as easy as any other audio recorder. That is why we recommend Wondershare Filmora as an alternative to Audacity Mac as it takes care of all the issues on Audacity and offers better features and functionalities.
Also read:
- [New] 2024 Approved Deciphering Digital Dominance YouTube Content Strategy Comparison
- [New] Cheap PC Screenshot & Recording Software Guide for 2024
- [New] Enhancing Remote Collaboration with Ease Mastering Skype Screen-Share Capabilities
- [Updated] 2024 Approved 8 Budget-Friendly, Cross-Platform Video Conferencing Tools Revealed
- [Updated] 2024 Approved Choosing the Right Medium Audio vs Video-Based Platforms
- [Updated] 2024 Approved Mastering Your Console Innovative Approaches to Xbox Captures
- [Updated] In 2024, Digital Dialogue Mastery Connecting with Viewers Flawlessly
- 2024 Approved SwiftSwirl MomentMirror Recording
- Can You Still Use ChatGPT? Discover Five Methods to Verify Its Functionality
- Discover What’s Next in Tech with Sony's 2024 Roadmap: Product Launches, Latest Updates & More
- How to Make a Collage on iPhone for 2024
- How to Transfer Data from OnePlus Nord N30 SE to BlackBerry | Dr.fone
- In 2024, How to Bypass FRP on Samsung Galaxy M14 5G?
- Syncing Songs with Stories and Videos on Instagram for 2024
- Title: 2024 Approved Unlocking the Full Potential of Mac Audio with Audacity's Features
- Author: Duchess
- Created at : 2024-12-31 17:27:40
- Updated at : 2025-01-07 12:22:14
- Link: https://screen-video-capture.techidaily.com/2024-approved-unlocking-the-full-potential-of-mac-audio-with-audacitys-features/
- License: This work is licensed under CC BY-NC-SA 4.0.