![[Updated] 2024 Approved FlashFreeze Video Cut-Out Instruction](https://thmb.techidaily.com/efc3f590fc068b65cc8e4c4fda82884c66683db0be7b320fd391a90a34b6fb91.jpg)
"[Updated] 2024 Approved FlashFreeze Video Cut-Out Instruction"
FlashFreeze Video Cut-Out Instruction
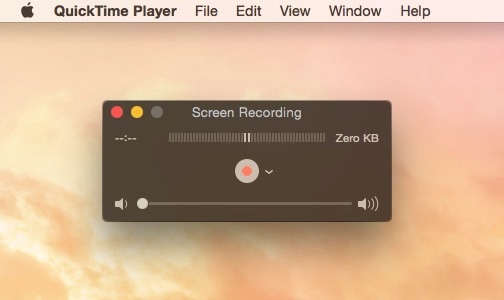
QuickTime Player by Apple is the default media player on Mac, and the application comes pre-installed on Mac. Unlike other media players, QuickTime Player is not just for playing audio and video files. The application can record the screen on Mac and save the recordings on the hard drive. Therefore, there is no need for any third-party screen recorder for basic recording. However, many users have reported that they cannot stop QuickTime screen recording following the standard procedure.
When the application fails to stop recording, it fails to save the recording as well. Therefore, QuickTime Player keeps recording the screen, and this slows down the Mac as it keeps occupying the system resources. In this article, we will illustrate all the possible ways to QuickTime Player stop screen recording. We will also recommend a better alternative to QuickTime for professional-quality screen recording.
Filmora Screen Recorder
Record computer screen and webcam
Capture system and microphone audio
Customize the target recording area
Edit videos with thousands of effects and tools
1. Direct Way to Stop QuickTime Recording
Under normal circumstances, you start recording with QuickTime by clicking on Record button on the top menu bar or on the Record button on the Recording bar.

In the same way, you need to stop recording by clicking on the Stop button either on the top menu bar or the Recording bar. If this normal way of QuickTime Player stop screen recording does not work, you have to try out the following ways.
2. Use Keyboard Shortcut to Stop QuickTime Recording
The best way to operate any screen recorder is by using the keyboard shortcuts. This is because when you record a screen with an application, the overlay bar stays hidden and if you move the mouse cursor to get the overlay bar, the cursor movement also gets recorded. Therefore, the best way to stop a recording is by pressing the default keyboard shortcut.
Coming to QuickTime Player, this method of QuickTime stop screen recording shortcut is only applicable when QuickTime Player has not frozen. If it is frozen, you have to force quit the application. Here are the steps to start recording normally and stop QuickTime recording using keyboard shortcut.
Step 1: Launch QuickTime Player and go to File> New Screen Recording. Instead of that, you can press Ctrl + Command + N keys together on your Mac keyboard.

Step 2: You will see the Recording bar where you can set the settings and click on Red button to start recording.
Step 3: If you want to stop recording and you cannot find the Recording bar to click on Stop button, you have to press Esc for Recording bar to reappear and then click on Stop button. However, you can use the keyboard shortcut of Ctrl + Command + Esc keys together to stop recording immediately.

Step 4: Once the recording stops, you can go to File> Save to export the recording in proper file format.
3. Force Quit to Stop QuickTime Recording
If you cannot stop the recording in the normal way as well as with the keyboard shortcut, you have to force quit QuickTime Player. This is because the application might have got frozen for some reason and force quit is the only option available. It is important to note that when you force quit QuickTime, the latest recording will not be saved anywhere. Here are the steps to follow force quit to stop QuickTime screen recording.
Step 1: Click on Apple menu and then click on Force Quit option.

Step 2: You will see a pop-up window where you have to select QuickTime Player. Finally, click on Force Quit button.

Step 3: You can also use keyboard shortcut to force quit QuickTime. You have to press Option + Common + Esc keys together. This will bring up Force Quit Application window where you have to select QuickTime and click on Force Quit button.
4. End Screen Recording in Activity Monitor
Just like Windows has Task Manager, Mac has Activity Monitor where you can see all the running applications. Similarly, you can terminate any running application directly from Activity Monitor. Therefore, if you terminate QuickTime Player from Activity Monitor, the application will terminate and the recording will stop. However, you will lose the recording as it does not get saved. Here are the steps to follow to stop screen recording QuickTime.
Step 1: On your Mac, go to Finder > Applications > Utilities > and finally select Activity Monitor.
Otherwise, you can go to Spotlight Search to search for Activity Monitor.
Step 2: Once Activity Monitor opens, select QuickTime Player.

Step 3: Click on Quit button and QuickTime Player will terminate and the recording will stop automatically.
5. Best Alternative to QuickTime for Recording
Even though QuickTime Player is more for playing media files, it gets the job of screen recording done swiftly. However, there are times when you can find the application getting frozen, and you cannot stop recording. But if this has become a common occurrence, you can think about switching from QuickTime to a dedicated screen recording software . Wondershare Filmora for Mac is a versatile screen recorder for beginners as well as professionals.

With Filmora, you can record not only the screen but also the webcam simultaneously. There are over unlimited visual effects available to insert into the recording to make the video professional as well as interesting to watch. Besides, there are different modes available such as Blending mode, Green Screen mode which are very useful.
Thanks to hardware acceleration, Filmora does not slow down Mac, and performance stays at the pro-level. Most importantly, the recording quality is stunning for uploading for different social media and video streaming platforms.
For Win 7 or later (64-bit)
For macOS 10.12 or later
The Conclusion
QuickTime Player is the ideal application on Mac for playing audio and video. It is also quite capable of recording the screen comfortably. However, users often face issue of QuickTime stop screen recording. If you are facing the same, go for keyboard shortcut. If that does not work, you have to force stop QuickTime. If the issue is frequently occurring, you can consider Wondershare Filmora to replace QuickTime Player for screen recording. It is a professional screen recording and video editing software available for both Mac and Windows users.
1. Direct Way to Stop QuickTime Recording
Under normal circumstances, you start recording with QuickTime by clicking on Record button on the top menu bar or on the Record button on the Recording bar.
In the same way, you need to stop recording by clicking on the Stop button either on the top menu bar or the Recording bar. If this normal way of QuickTime Player stop screen recording does not work, you have to try out the following ways.
2. Use Keyboard Shortcut to Stop QuickTime Recording
The best way to operate any screen recorder is by using the keyboard shortcuts. This is because when you record a screen with an application, the overlay bar stays hidden and if you move the mouse cursor to get the overlay bar, the cursor movement also gets recorded. Therefore, the best way to stop a recording is by pressing the default keyboard shortcut.
Coming to QuickTime Player, this method of QuickTime stop screen recording shortcut is only applicable when QuickTime Player has not frozen. If it is frozen, you have to force quit the application. Here are the steps to start recording normally and stop QuickTime recording using keyboard shortcut.
Step 1: Launch QuickTime Player and go to File> New Screen Recording. Instead of that, you can press Ctrl + Command + N keys together on your Mac keyboard.
Step 2: You will see the Recording bar where you can set the settings and click on Red button to start recording.
Step 3: If you want to stop recording and you cannot find the Recording bar to click on Stop button, you have to press Esc for Recording bar to reappear and then click on Stop button. However, you can use the keyboard shortcut of Ctrl + Command + Esc keys together to stop recording immediately.
Step 4: Once the recording stops, you can go to File> Save to export the recording in proper file format.
3. Force Quit to Stop QuickTime Recording
If you cannot stop the recording in the normal way as well as with the keyboard shortcut, you have to force quit QuickTime Player. This is because the application might have got frozen for some reason and force quit is the only option available. It is important to note that when you force quit QuickTime, the latest recording will not be saved anywhere. Here are the steps to follow force quit to stop QuickTime screen recording.
Step 1: Click on Apple menu and then click on Force Quit option.
Step 2: You will see a pop-up window where you have to select QuickTime Player. Finally, click on Force Quit button.
Step 3: You can also use keyboard shortcut to force quit QuickTime. You have to press Option + Common + Esc keys together. This will bring up Force Quit Application window where you have to select QuickTime and click on Force Quit button.
4. End Screen Recording in Activity Monitor
Just like Windows has Task Manager, Mac has Activity Monitor where you can see all the running applications. Similarly, you can terminate any running application directly from Activity Monitor. Therefore, if you terminate QuickTime Player from Activity Monitor, the application will terminate and the recording will stop. However, you will lose the recording as it does not get saved. Here are the steps to follow to stop screen recording QuickTime.
Step 1: On your Mac, go to Finder > Applications > Utilities > and finally select Activity Monitor.
Otherwise, you can go to Spotlight Search to search for Activity Monitor.
Step 2: Once Activity Monitor opens, select QuickTime Player.
Step 3: Click on Quit button and QuickTime Player will terminate and the recording will stop automatically.
5. Best Alternative to QuickTime for Recording
Even though QuickTime Player is more for playing media files, it gets the job of screen recording done swiftly. However, there are times when you can find the application getting frozen, and you cannot stop recording. But if this has become a common occurrence, you can think about switching from QuickTime to a dedicated screen recording software . Wondershare Filmora for Mac is a versatile screen recorder for beginners as well as professionals.
With Filmora, you can record not only the screen but also the webcam simultaneously. There are over unlimited visual effects available to insert into the recording to make the video professional as well as interesting to watch. Besides, there are different modes available such as Blending mode, Green Screen mode which are very useful.
Thanks to hardware acceleration, Filmora does not slow down Mac, and performance stays at the pro-level. Most importantly, the recording quality is stunning for uploading for different social media and video streaming platforms.
For Win 7 or later (64-bit)
For macOS 10.12 or later
The Conclusion
QuickTime Player is the ideal application on Mac for playing audio and video. It is also quite capable of recording the screen comfortably. However, users often face issue of QuickTime stop screen recording. If you are facing the same, go for keyboard shortcut. If that does not work, you have to force stop QuickTime. If the issue is frequently occurring, you can consider Wondershare Filmora to replace QuickTime Player for screen recording. It is a professional screen recording and video editing software available for both Mac and Windows users.
Also read:
- [New] The Ultimate Guide YouTube Keyword Research Made Easy for 2024
- [New] Unpublished Photography Scrutiny & Complementary Selections
- [Updated] 2024 Approved How to Disable IGTV Feature
- [Updated] 2024 Approved No More Troubles? Mastering iPad Video Captures Now
- [Updated] 2024 Approved The Recorder's Eye A Snapshot of Best Tools
- [Updated] Digital Rehearsal Mastery in Recording Streaming Audio
- [Updated] In 2024, Steps to Cure Intermittent OBS Frames
- [Updated] In 2024, Transform Your Team Sessions Masterful Use of Slack & Filmora Tools
- In 2024, Determinants of YouTube Video Prominence and Success
- In 2024, How To Pause Life360 Location Sharing For Motorola Edge 40 | Dr.fone
- In 2024, How to Track Oppo K11x Location without Installing Software? | Dr.fone
- In 2024, Top 10 Impactful Instagram Tags for Maximum Reach
- Lösungen Für Ein Defektes Windows-11-Startmenü: Entdeckt Die Effektivsten Methoden Zur Beheilung Des Problems (9 Tipps)
- Seamless iOS Device Synchronization with Your Mac - No Need for iTunes!
- Title: [Updated] 2024 Approved FlashFreeze Video Cut-Out Instruction
- Author: Duchess
- Created at : 2025-01-08 19:17:02
- Updated at : 2025-01-13 16:13:52
- Link: https://screen-video-capture.techidaily.com/updated-2024-approved-flashfreeze-video-cut-out-instruction/
- License: This work is licensed under CC BY-NC-SA 4.0.